

Busy
Life is too busy, so here's a collection of thoughts, check out the Archives since I moved some stuff there to make the site faster, and play the new games and explore the new links!:
I want to thank everyone for giving me such an awesome 21st birthday. All day everywhere I went people wished me a happy birthday, and it was so great to feel such a response from everyone I know. Also, thanks to everyone for something that means a lot, everyone respected my decision to not drink alcohol, and the only people who teased me about it meant it in good humor. It's really a great feeling to know I'm surrounded by so many people that respect me and my decisions, and my heart goes out to all of you!
"Beliefs do not work because they are true; they are true because they work. If, for a particular person, a belief in God works - that is, if it produces practical benefits in terms of happiness, personal adjustment, and psychological health - then for that person, the existence of God is a pragmatic truth. If a person believes that bathing in a particular mineral bath - something [William] James did - will relieve back pain, and it does, then that is a truth for that person. However, such beliefs or truths are not absolute and should not be imposed on others. Because each person's system of beliefs must be established using pragmatic criteria, pragmatic philosophy is an individual and relative system. The pragmatist judges all beliefs by their consequences in action: the statement that John is six feet tall means nothing more than that a one-foot rule can be turned end over end six times alongside John; the statement can be defined operationally. James beleived that pragmatic criteria can resolve the seemingly eternal clash between rationalism and empiricism. James believed rationalists to be intellectual, idealistic, optimistic, religious, free-willed - in summary, "tender-minded," and empiricists to be sensationalistic, naturalistic, scribing to a personality typology." - David Hothersall, summarizing the beliefs of Psychologist and Philosopher William James.
I got a baby turtle, it's a False Map Turtle and it's ferocious, it attached the turtle Jenn's roommate got right away so we had to separate them, I named it The Baron Von Deutchenheim The Second since he needs a royal sounding name, but he's "The Baron" for short. He's neat, and the size of a golf ball.
I am NOT a Christian.
That picture took too long to load, save to say Bush sucks but I'm over it.
Snazzy Duct Tape Jacket!
For Meg's 19th birthday, I made her a duct tape jacket. It's pretty rad, I consider myself a connesiur of the duct tape arts. Here is my tale.

Supplies. Notice the virgin jacket I pulled out of the thrift shops. Perfect size for Meg.
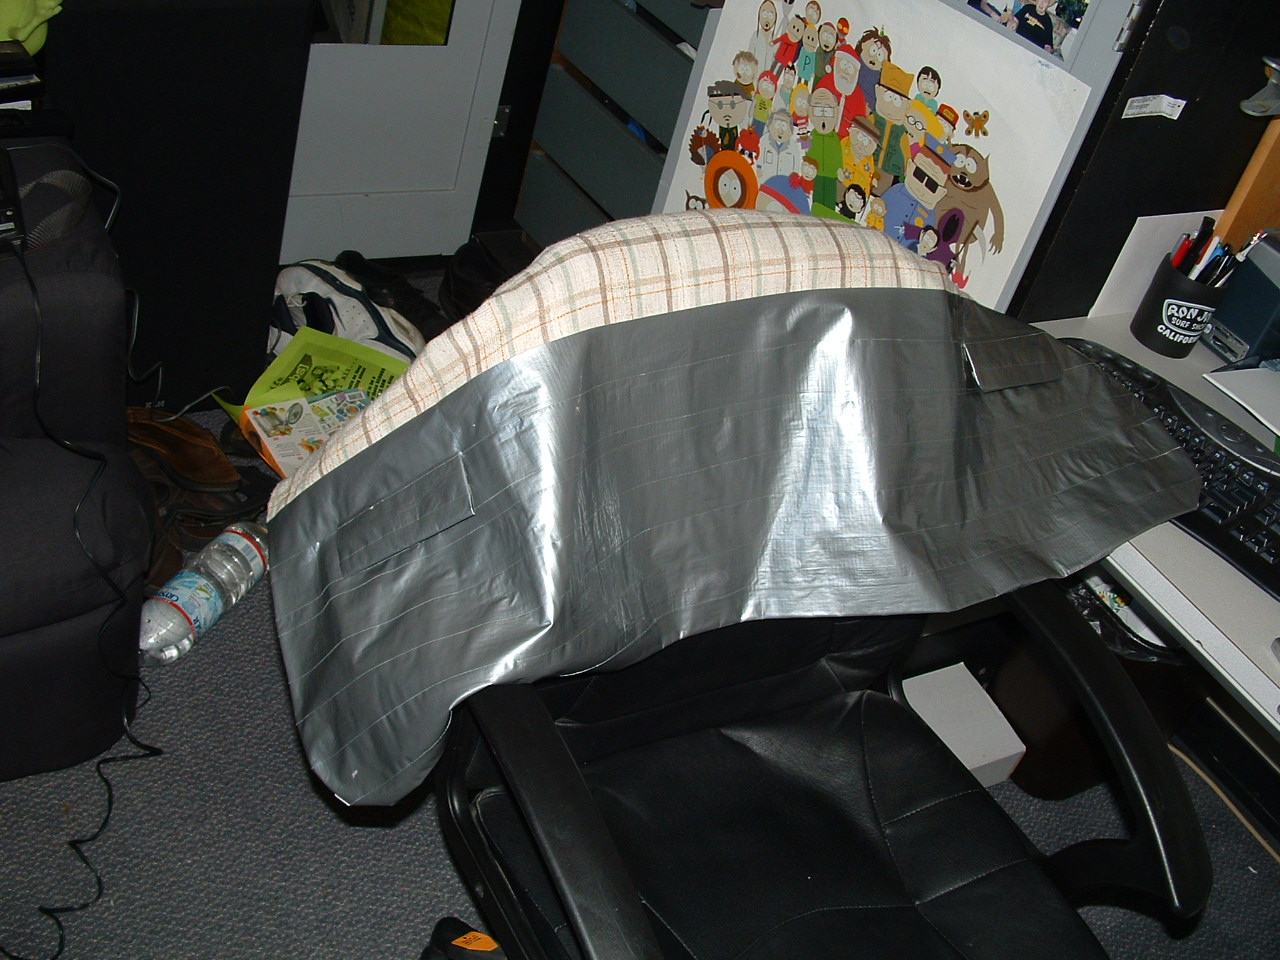
It begins, like the mirror covering Neo's arm in the Matrix!

You can keep drugs in the pockets.

Flash forward to when I'm done covering it in silver tape. It's awesome.

Slightly closer.
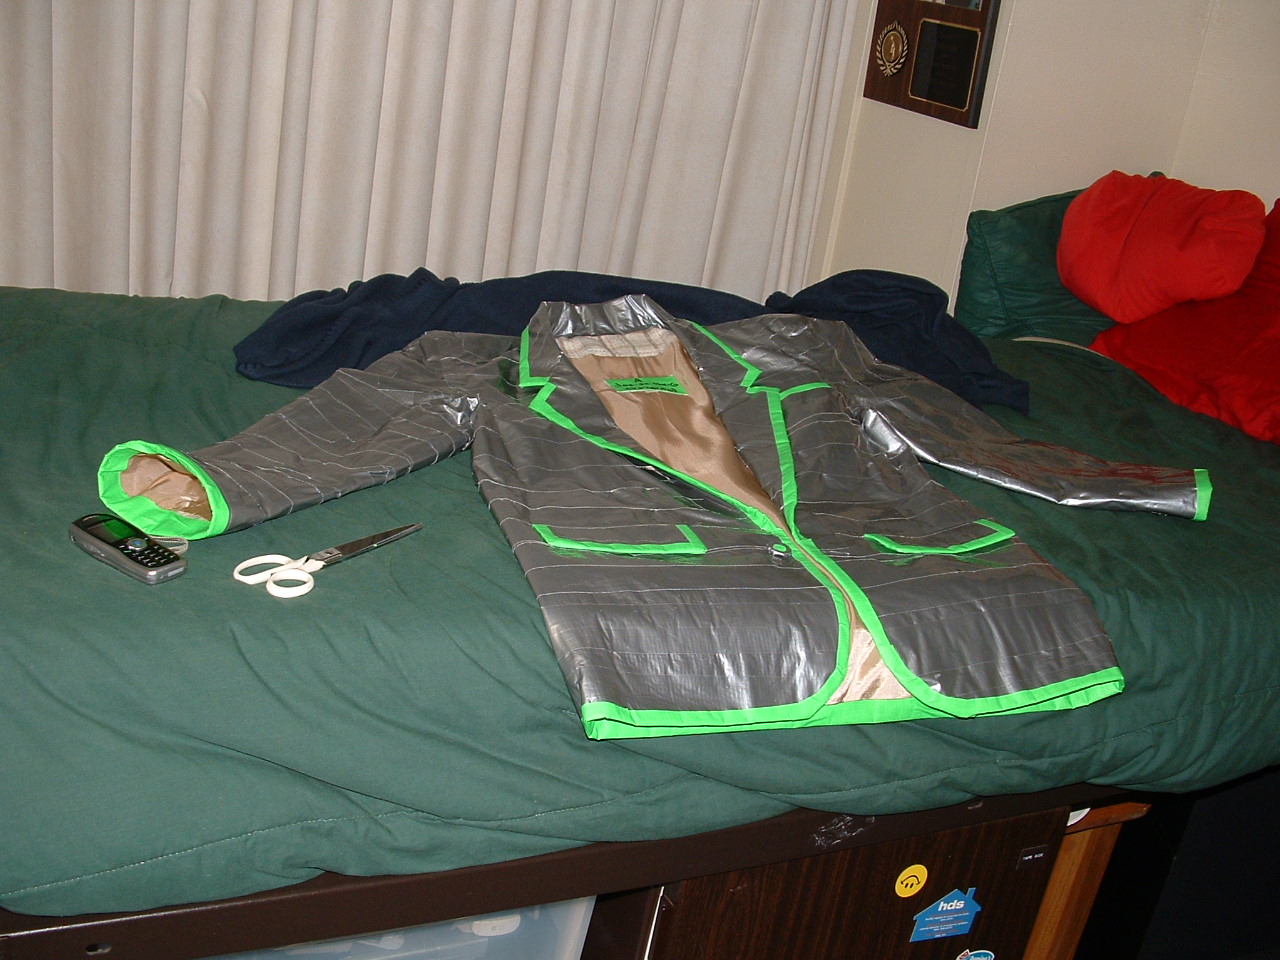
Poof! Outlined in green to give it pizzaz!

Pretty badass, huh?

The back.

It's the details that make this thing pop. Hope you appreciate my work!
Xecuter 3 Xbox Chip Installation
I used to use the Xecuter 2.3b lite mod chip, but recently the good people at team Xecuter came out with the Xecuter 3 mod chip. Installation is so much easier, especially from the software side of things. There's a lot more features, and much more possibility for expansion. So, since I install chips for so many of my friends, (though I never install them past the illegal software stage) I got a pristine board to show you a full X3 installation.
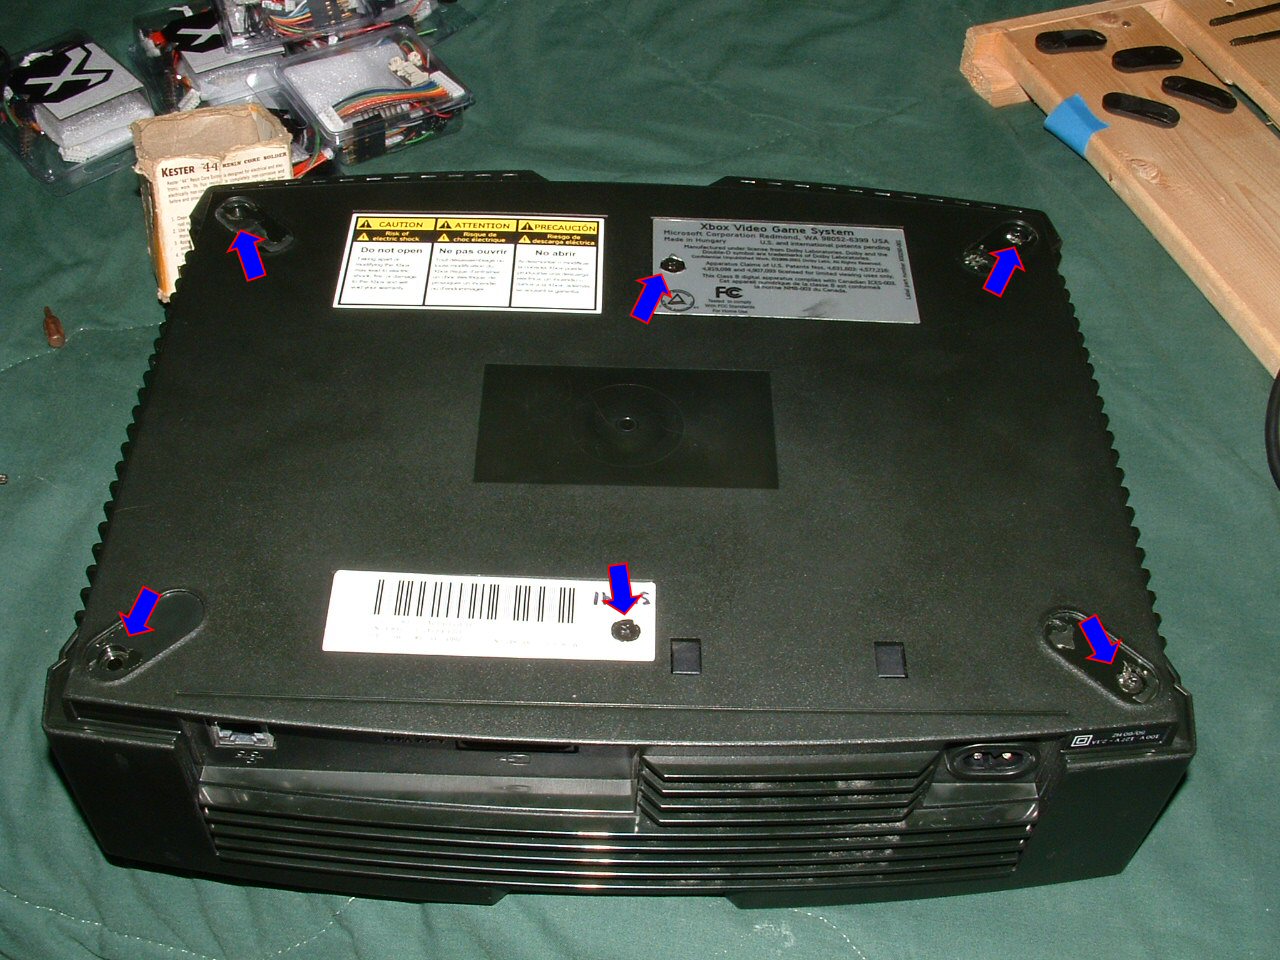
To install, unscrew the 6 bottom screws with a T-20 torx wrench.
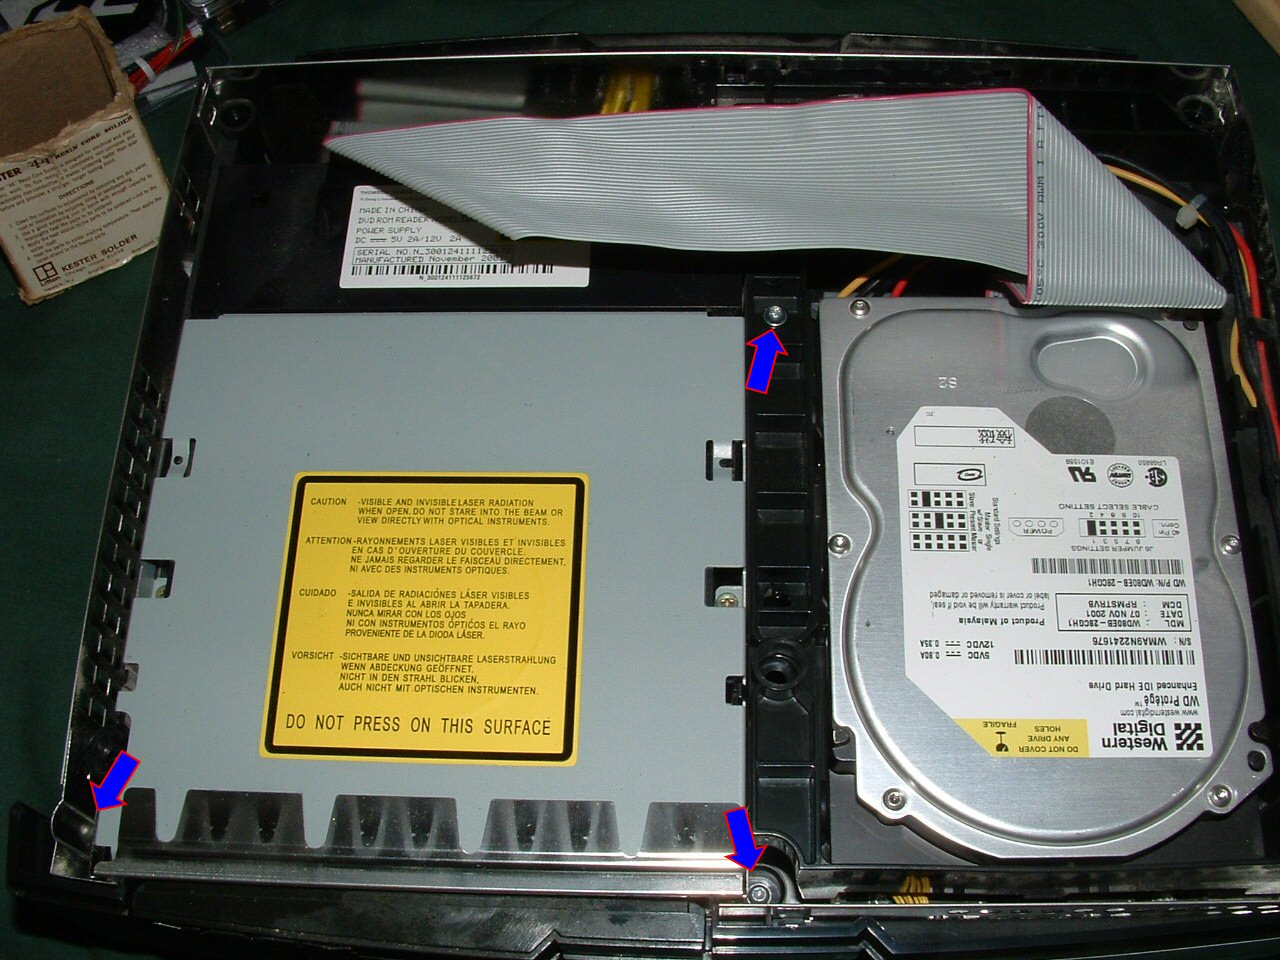
Using a T-10 torx wrench, remove the screw from the middle of the hard drive assembly and the 2 from the DVD-ROM assembly. Pull out the cables from the back of the HDD and DVD-ROM, and pull both devices and their plastic trays out. It's important to note who makes the DVD-ROM, since different ones (I think there's 3, Samsung, Toshiba and Panasonic) have different strengths to be aware of.
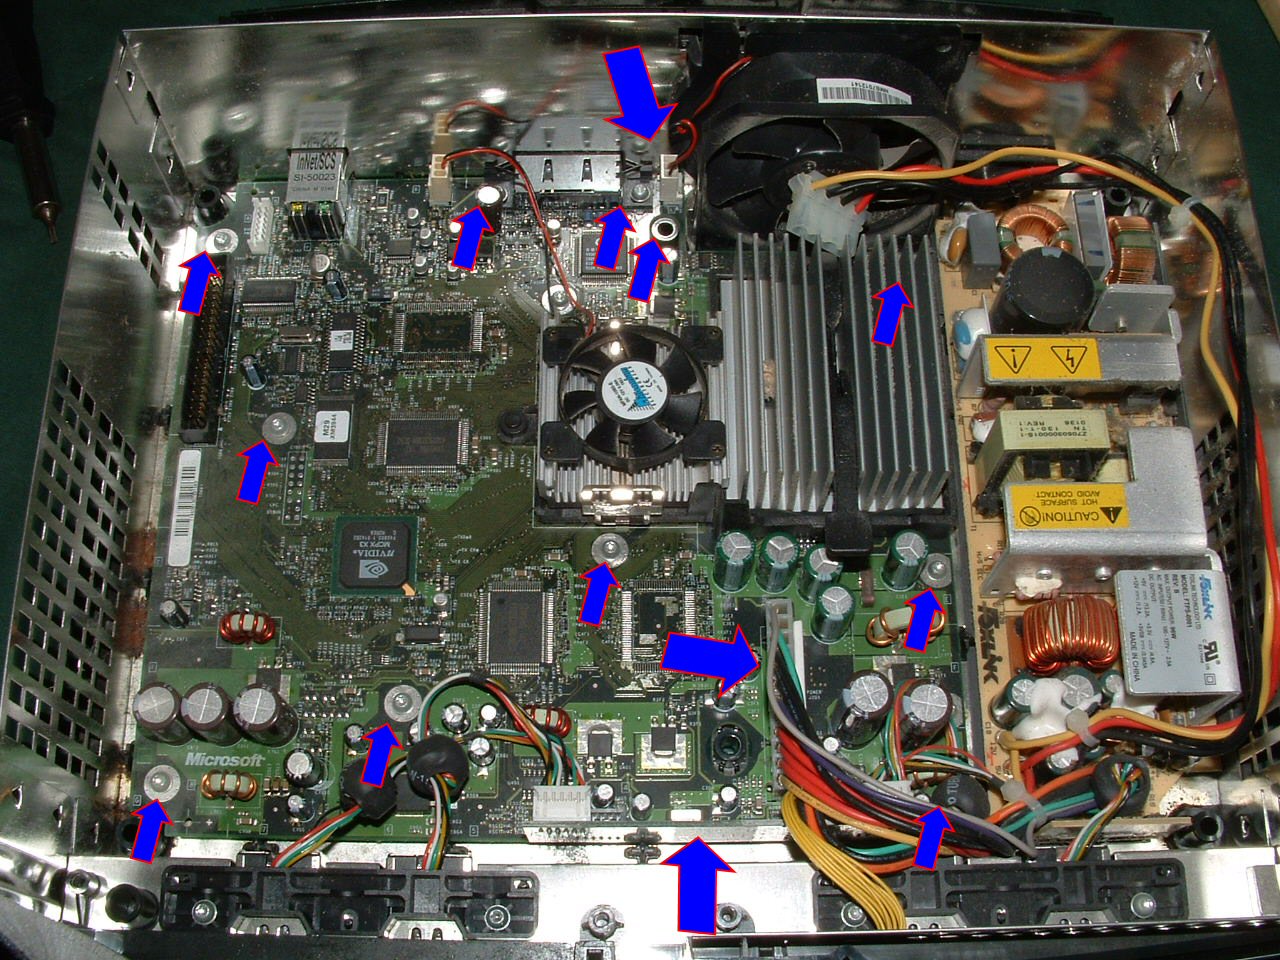
Remove all the T-10 screws from the board, remove the fan plug from the board, and remove all the controller/power supply plugs and finally remove the boars from the case.

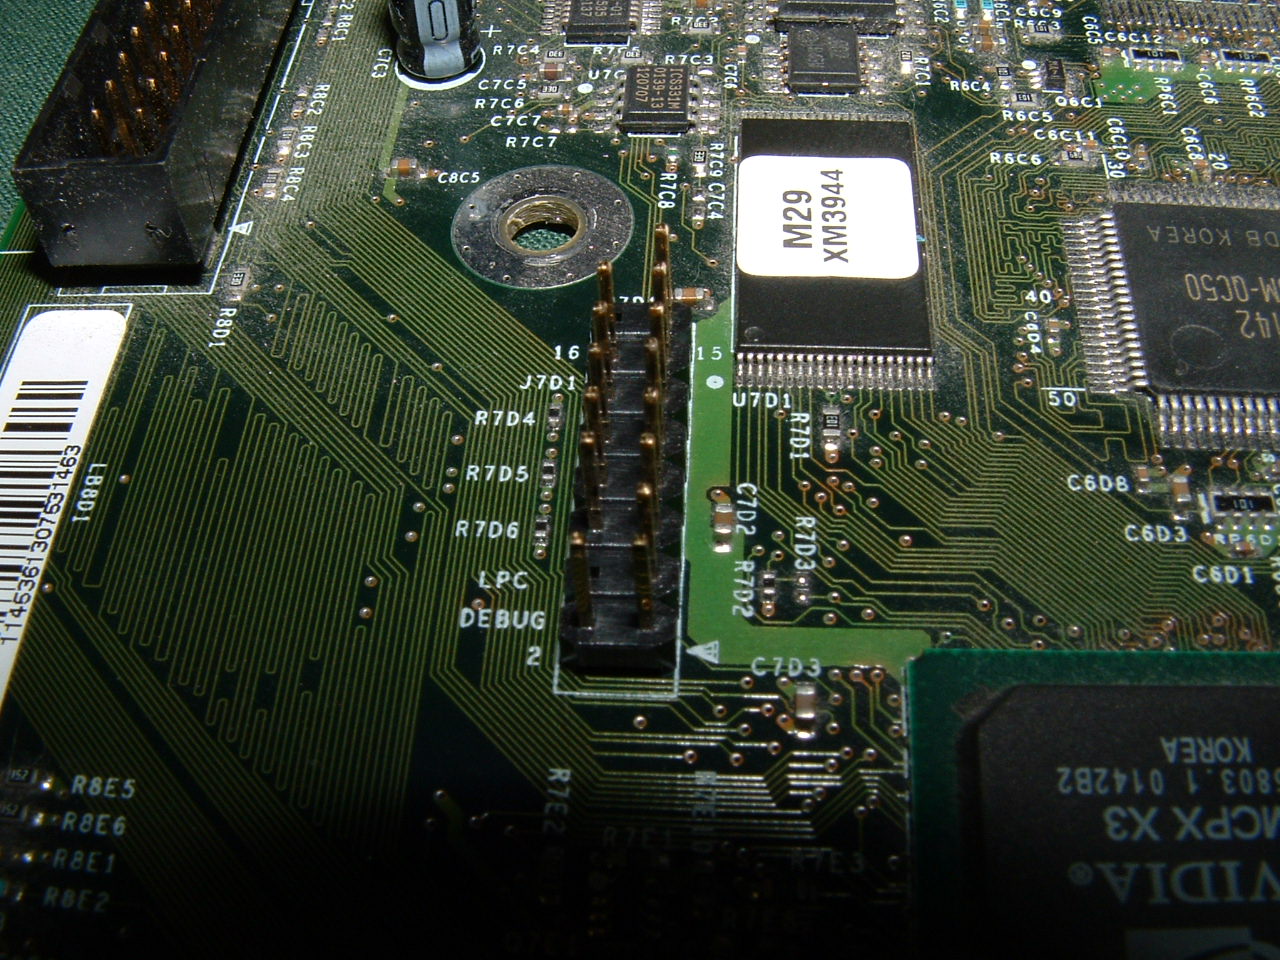
This is the LPC BUS with the solder filled in. This is only a factor on the 1.0 version of the board, but if you have this, you need to remove the solder. No worries, not too hard, google "solder sucking."

See? Clean!
With the chip is a pin header. One pin needs to be removed (on the left column, notice 2 are out, the top one and the second from the bottom) and then it needs to be placed in the holes. This is on the top of the board, it'll only fit in in one way. Tape this to the board temporarily using any tape.

This is the bottom of the board before the pins get soldered. The tape is to hold the pin header during this process.

Properly soldered joints. If you have a 1.6 or 1.6b board, Microsoft moved the actual board contacts that connected to the LPC BUS, in order to deter modders. The LPC must be reconstructed, and the points to do that are listed at www.team-xecuter.com. It's not too complicated, I imagine Microsoft left the LPC BUS there since it was easier to stamp a board the same shape. Makes it easy for us!

Three more points are important on the back of the board: The contact for the HDD indicator light, the contact for the LAN indicator light, and the d0 point. The d0 point grounds out the original BIOS chip that we're replacing when the chip is enabled, it's essential.
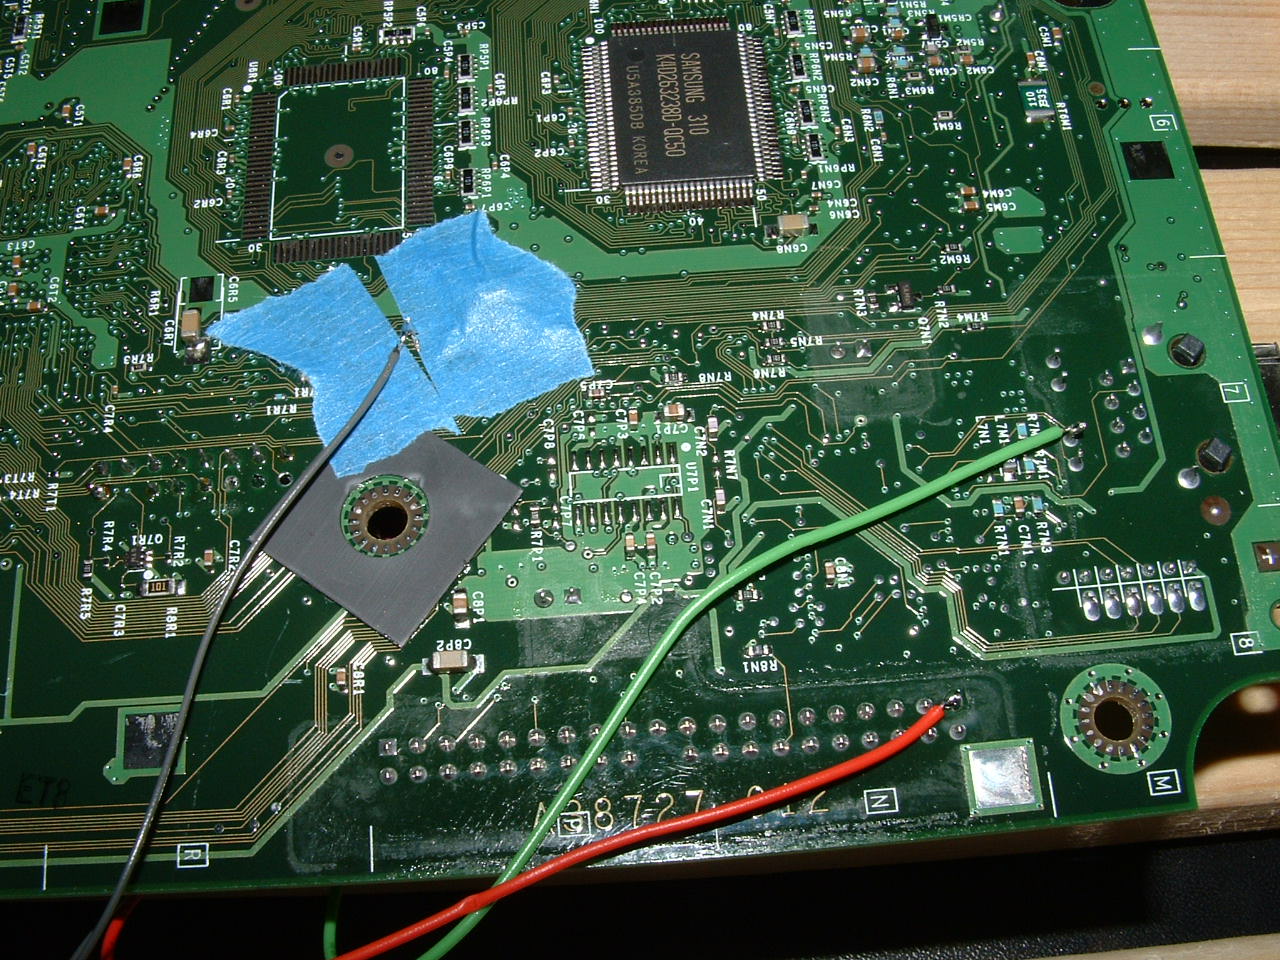
Soldered points with the appropriate colored wires, this wire harness comes in the kit. The board can now be replaced in the case and all motherboard screws can be installed.

This is the little board which should be stuck on the inside of the front of the case. There is a yellow wire which controls the power and eject button and the LED's, that goes into this and the multicolored plug on this goes into the motherboard. The red wire goes to the X3 chip to the only plug it fits.

Looks like this when all together, the green board in front of it is the controller port control board that is unique to the 1.0 motherboard, but the little board still fits behind it.
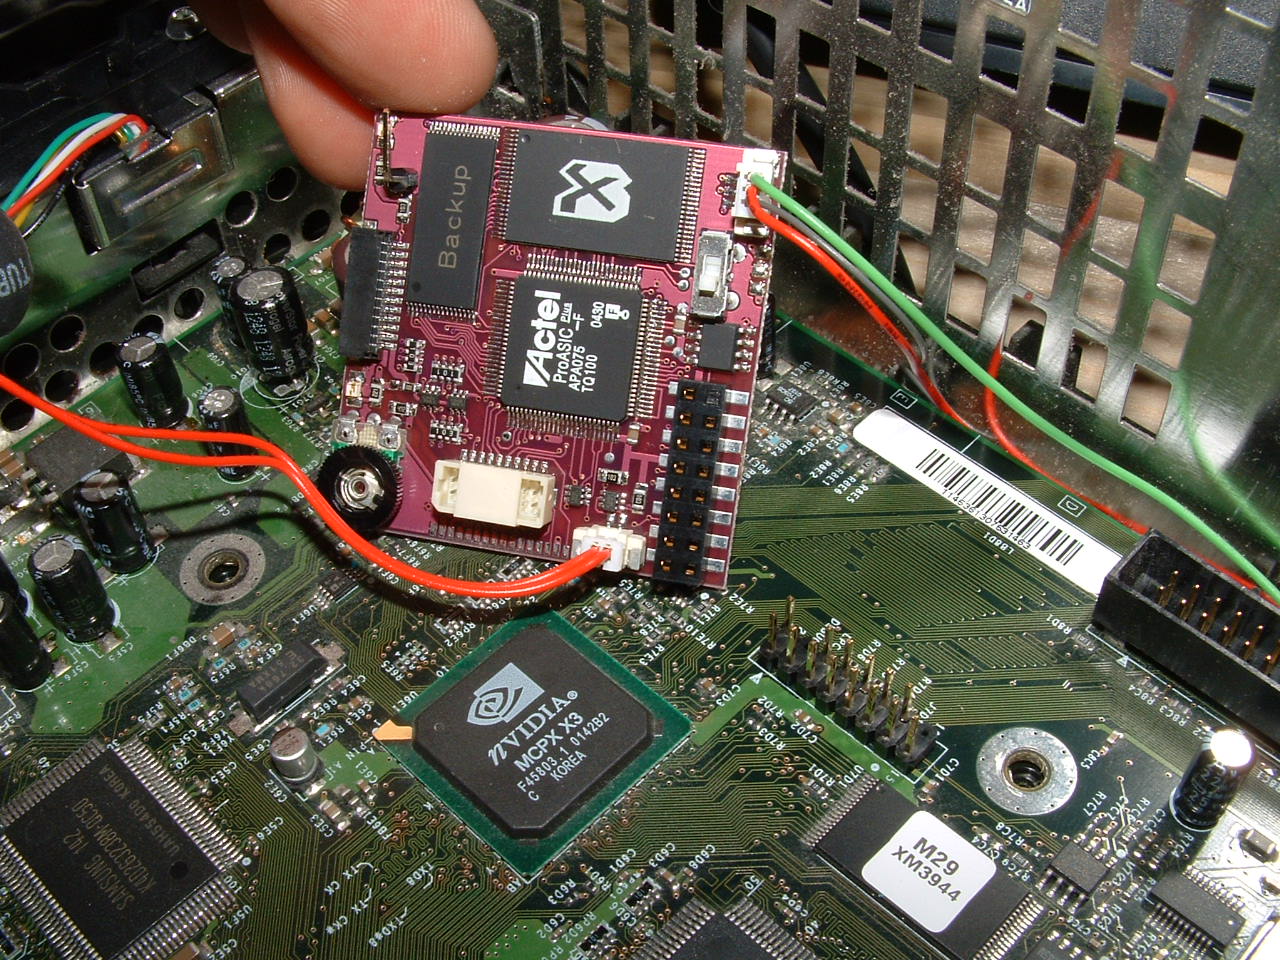
You can see how the X3 fits on the pin header. There's some black wires that come with the kit, those can go to the front indicator which also comes with the kit, although for most people I find it's not something they want. If you want it, just feed the black wires out the front and use the sticky tape to put the panel on the front of the board.
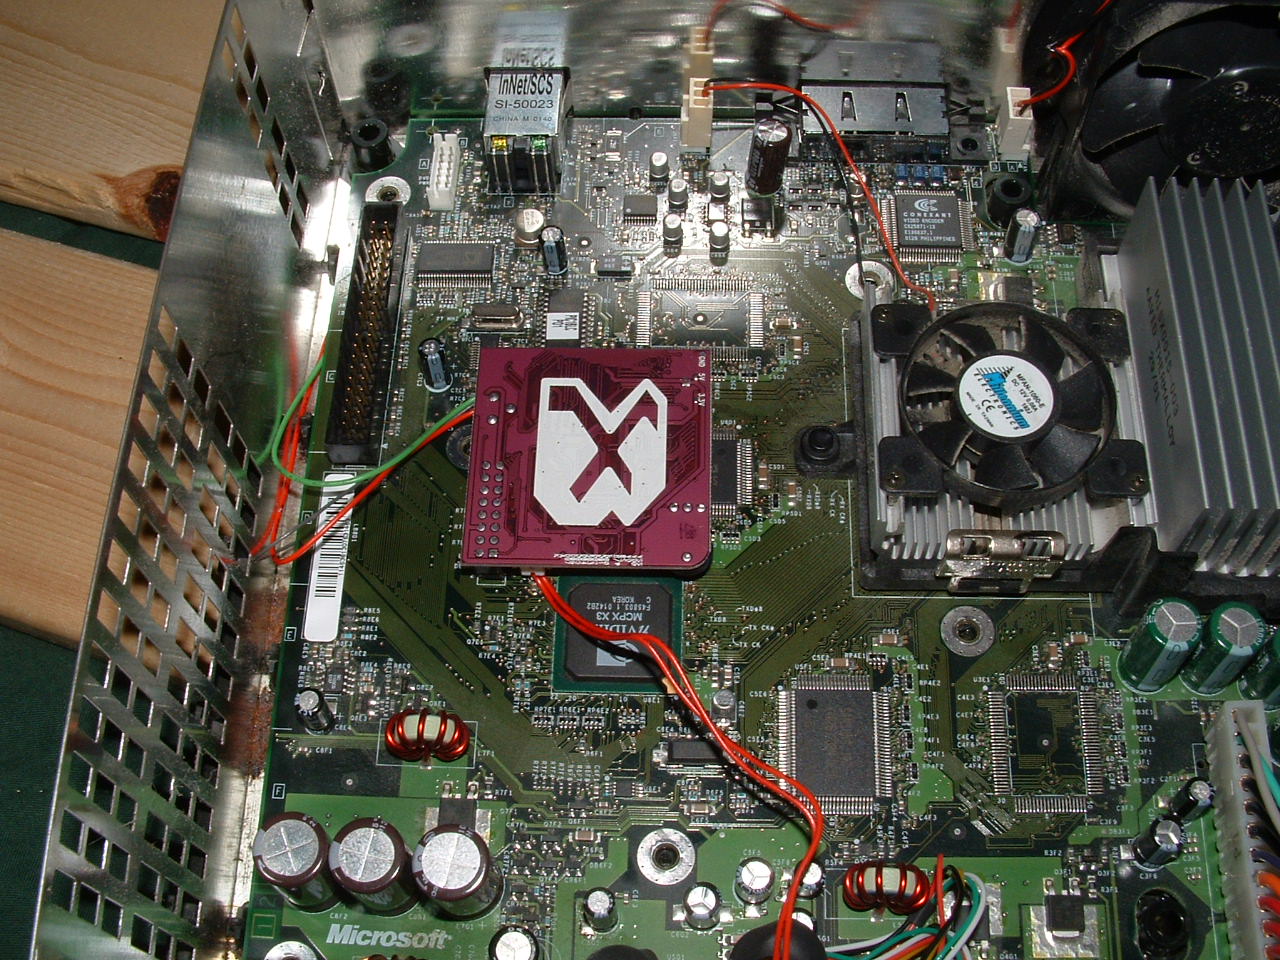
Pop the chip on the pin header and you're good to go!