Server:Server Status

The Dresser

  Let's talk about how wonderful my apartment experience has been. Fuck Tallahassee housing. So, in case you don't know already, I'm moving to a new place with new people that will hopefully be better than el old Echang-o, and since this new place is unfurnished and my old place was furnished, I've been in a mad dash to acquire furniture. In addition, since Jenn and I are getting married and all and will be moving in together, we're thinking of getting things cheap now that we can use when we're together. Hence, the dresser.
  I saw an ad for this dresser on Craigslist for 50 bucks. Jenn and I were looking for something low with a mirror for when we're together, and this fit the bill perfectly. Also, since we like to do projects, we thought we'd do one of our first real Trading Spaces-ish project together with this.
  The original piece is particle board with white laminant, not a good formica laminant but glorified sticker paper that was clearly wearing through. My mouse sander tried to take off as much as it could but the age of the sticky crap just made it gum up all my sanding pads. We gambled if the paint we got would stick to a roughed up surface over a completely bare surface and did the best we can, leaving a lot of white laminant on the piece. The paint we used was a Kilz acrylic-latex paint from Wal-Mart, simply since it was the cheapest we could get ($7 a bucket custom mixed). We got one Black and one "Black Cherry" after seeing that the Fleur De Lis I got for my walls looked pink when it dried against the black on a sample piece. We didn't actually get to see how it would dry when we bought it and thought it would be too dark, and honestly almost bought a lighter one, but when you see the finished product I think you'll agree we chose the right color. We also bought some wood putty and a wood grainer (about $5 together, though I don't count them in the cost since I'll keep and reuse them). Jenn bought the 6 hardware pieces for $3 each, and we bought 2 2x4 pieces of 1/8 hardboard to replace literally the cardboard stapled to the back of this thing ($4 each). So far, we're at $90.
  The plan was to fill the old drawer pull holes, lay the black down first in a good coat, let it dry, then grain the wood over it. The wood graining tool works by laying paint in different patterns as you rock it as you drag it across your piece. Long story short, as soon as the rubber graining tool touched the latex paint it started scraping it off the leftover laminant of the original wood. After destroying the counter top and 3 drawers, we realized we'd have to go back and re-sand.
  We went to Home Depot and rented a belt sander and got 2 belts for about $30 for 4 hours and took it home, thinking I'd be done in about an hour. Not so much, as soon as it touched the dresser everything just became a gummy mess in about 1/2 a second. We almost decided to scrap the project, but I am to bull headed and determined to succeed so I used the gummy belts to literally friction all of the paint and laminant off. I was a mess, the outside of my apt was a mess, and the only thing that looked good was the dresser. I'm surprised the cops didn't get called, this belt sander was as loud as 4 shop vacs and I did it in front of my front door at my complex for 2 hours. OOPS! What helped was using a putty knife to peel off as much of the black paint as we could, and the good thing we noticed is that the rounded edges of the drawers (where all the laminant had originally been sanded off) were keeping the paint well.
  So we returned the sander and painted it black again. Once it dried, it finally took the overcoat! 1 night later and it was as good as wood. Jenn left for CA and I poly'd it 3 times before Rachel came home, drilled and installed the hardware, and put it back out of the way. After the belt sander, this project cost about $120, which I don't think is bad, I bet I could now sell it for that much on craigslist. For the low cost and the amount of fun, I'd say this was well worth the result.
Dresser 01
The dresser in its original condition, note the mismatched hardware and corner damage. The base piece also sticks out the sides a lot, I sanded it flush.

Dresser 02
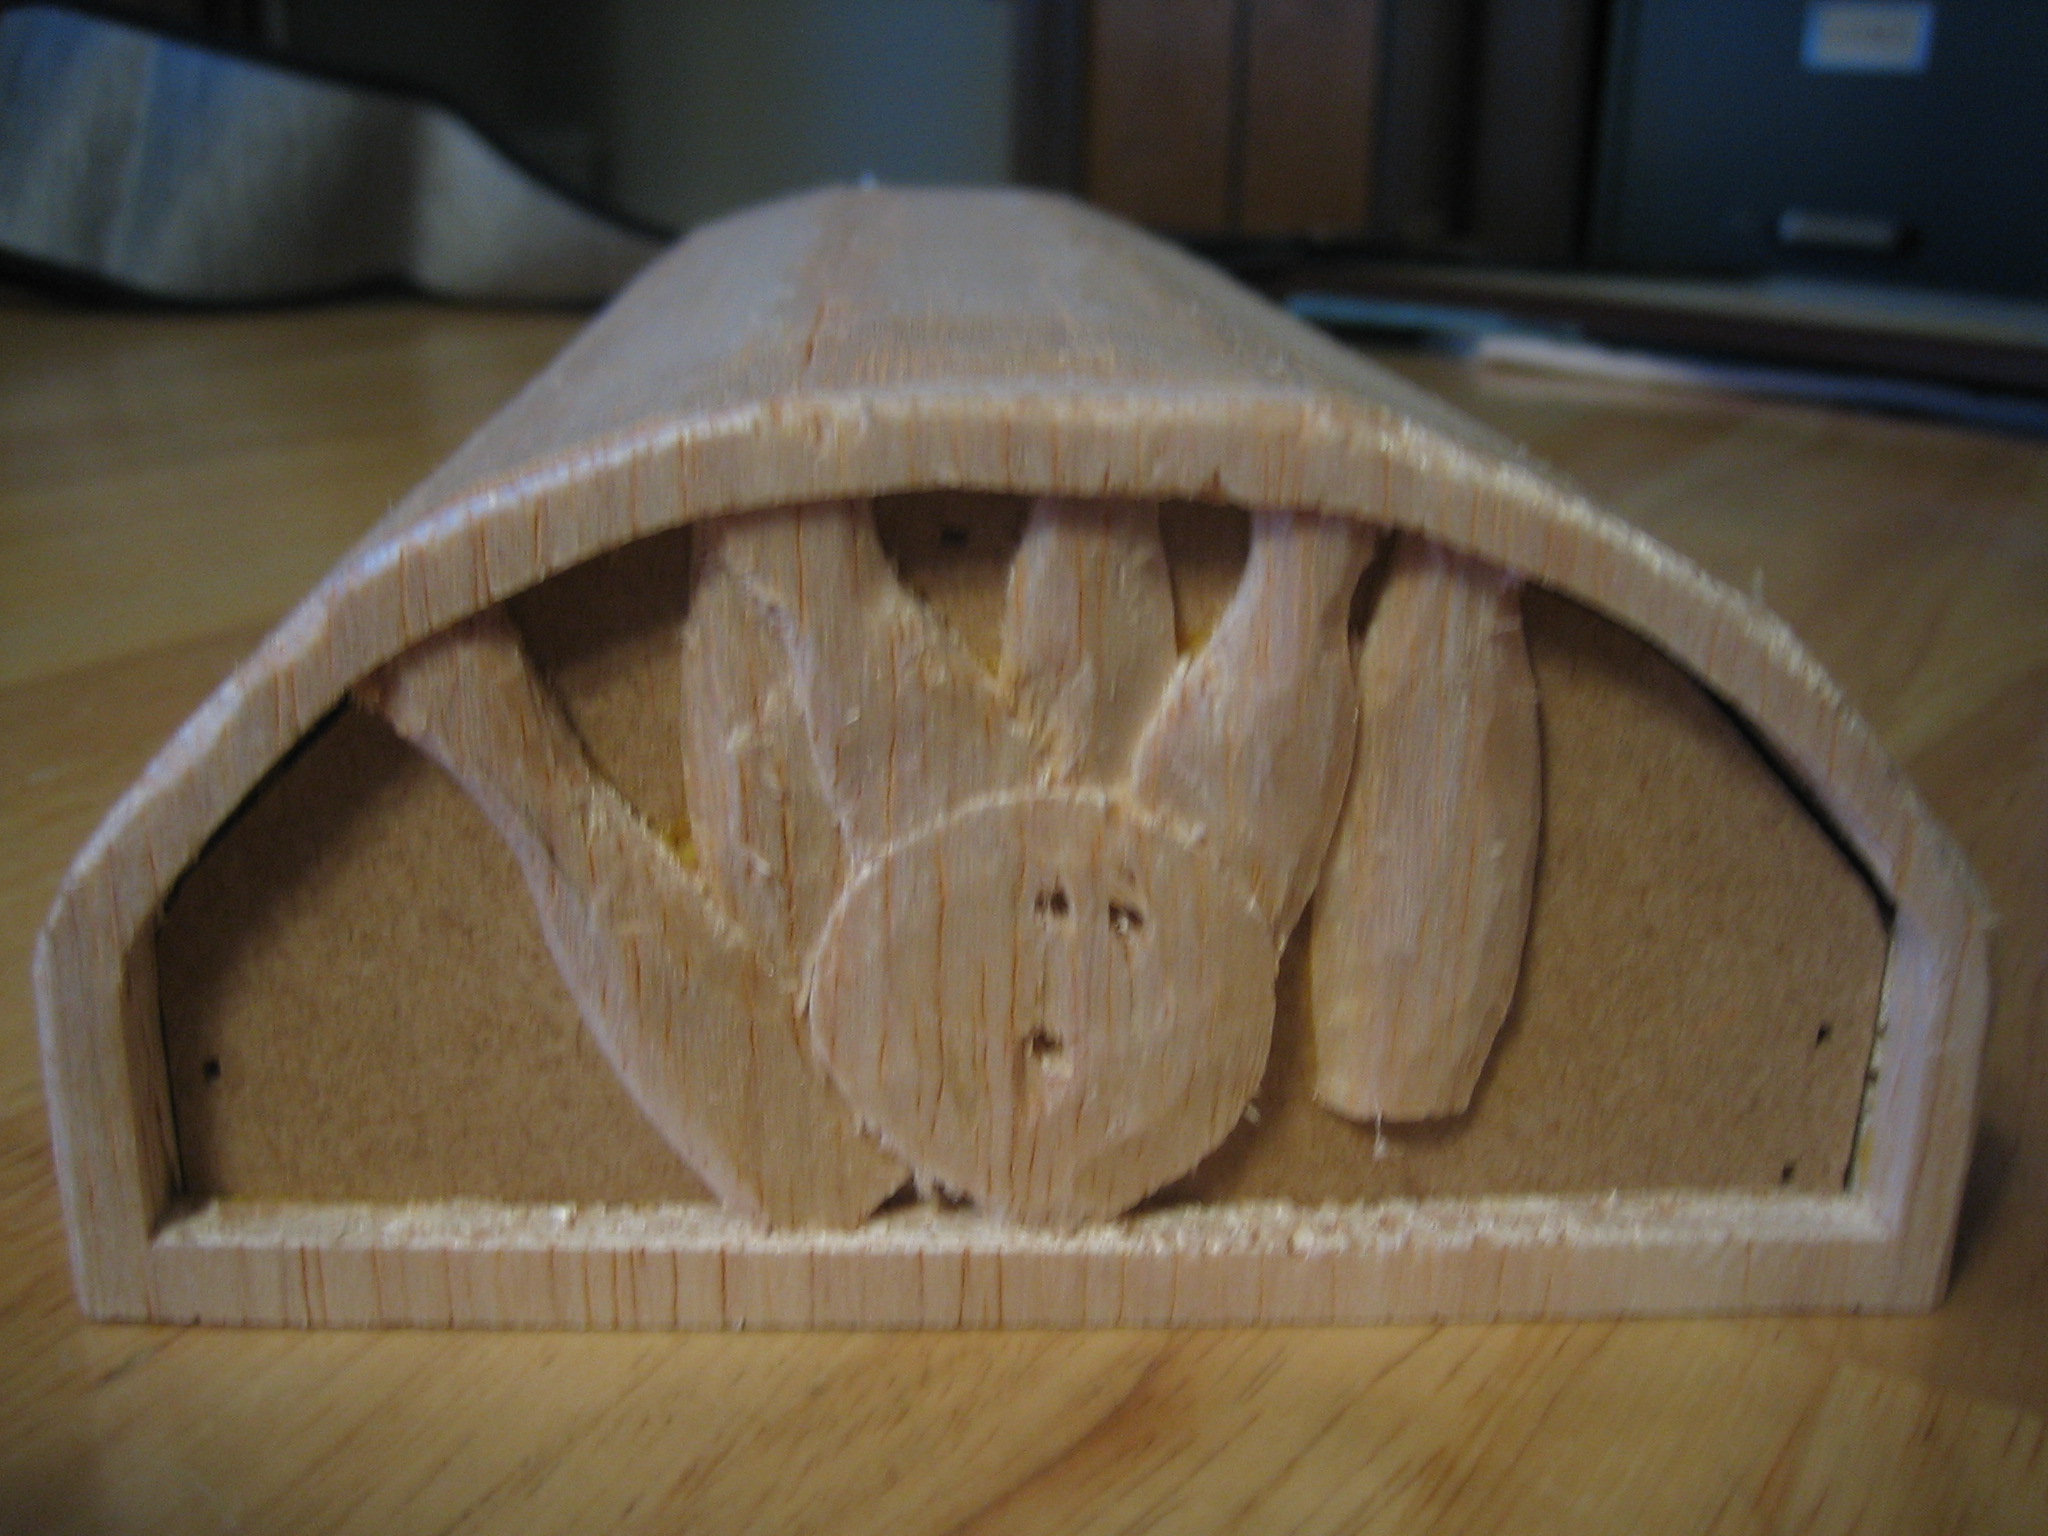
The inside of a drawer, they're not huge but then again we don't have a lot of stuff, and Jenn has an upright dfresser as well.

Dresser 03
More countertop and drawer.

Dresser 04
Side view, notice the bottom board sticking out and the corner damage.

Dresser 05
The mirror which attaches to the back, sorry you have to see my fat legs but you still need to see this piece.

Dresser 06
After the belt sanding incident, we reblacked it and applied the paint. Here you can see an intermediate step, and you can see the color before the polyurethane goes on. Neat photos.

Dresser 07
You can see through to where I hammered the hardboard to the back, much better than crappy cardboard like it came with if you ask me.

Dresser 08
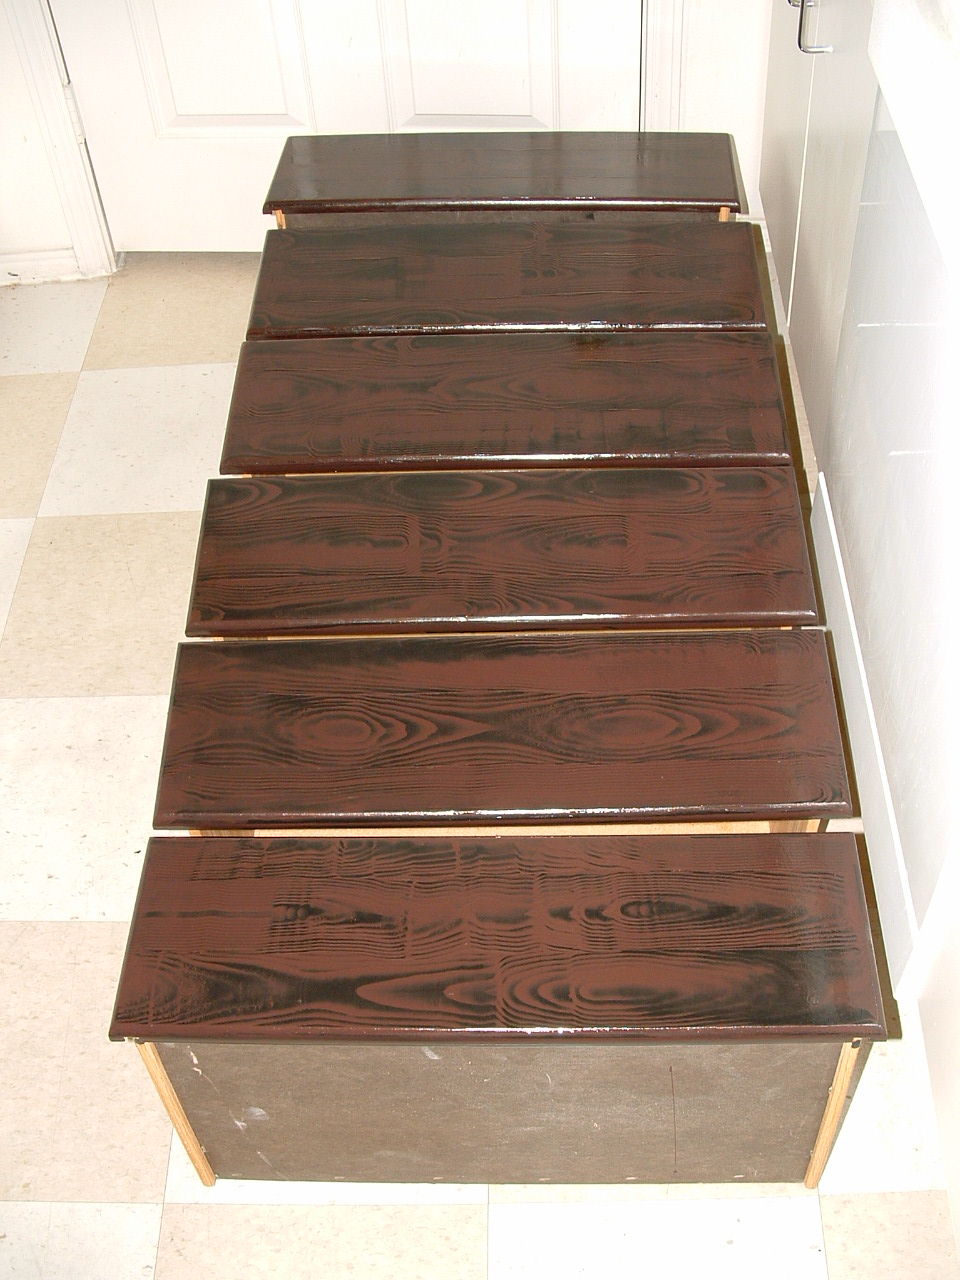
Like how that comes out like wood grain? Great technique, easy to do.
Dresser 09
Poly on the drawers, what a huge mess in my apartment!
Dresser 10
Finished dresser, with hardware on, if you notice it when you walk in it really, really looks like stained wood!

- - - - - - - - - - - - - - - - - - - - - - - - - - - - - - - - - - - - - - - - - - - - - - - - - - - - - - - - - - - - - - - - - - - - - - - - - - - - - - - - - - - - - - - - - - - - - - - - - - - - - - - - - - - -

Tattoo GUN.

Well, I do love projects. First, my N64 is working on batteries and almost done. Second, I'm buying a dead truck to learn to work on cars. Third, I made a Tattoo Gun using prison techniques. It's cool, check it out. Fourth, my amp is now complete since I added an input signal to the middle of a subwoofer/receiver combo system to use the receiver as just a powered sub. More pics on all this soon, have a good one!

- - - - - - - - - - - - - - - - - - - - - - - - - - - - - - - - - - - - - - - - - - - - - - - - - - - - - - - - - - - - - - - - - - - - - - - - - - - - - - - - - - - - - - - - - - - - - - - - - - - - - - - - - - - -

Homemade Tattoo Gun

  Since I got my tattoo, I've been fascinated with the art. It's amazing that some of the stuff is done the way it is, but most impressive to me is prison tattoos. How can someone make something that is so complex out of such limited supplies? Well, me being me, I had to try. With some basic guides online, I set out to build it. Sound tough? In addidion, I decided to do it only using tools available in prison to prisoners!
  First, to just lay it out, I don't condone the use of these things, nor will I use this on myself, and I don't think you should build one yourself to do your own tattoos. Go to a parlor and get something you'll be proud to wear for the rest of your life. Also, if you do make one, you need to not use it on yourself. First, this isn't clean or sterile, so you'll get AIDS. Second, if you make your own ink, you'll get some other disease and your body may attack it making you sick. All in all, if you make one and want to use it, get some meat or something and work on that, or some foam. Anything that will accept ink. There's my speech.
  So, I got the materials: A motor from a tape player, a paperclip, sand paper (could use a cinder block if it can't be acquired) a pen, hot glue sticks, a lighter, a plastic cup (or any semi-rigid plastic), some tape, and a battery (and if lucky a battery holder, depending on the type of battery).
  The principle is this: use the battery to raise and lower the needle attached at an off center point and guided to a pen. I took the motor and wrapped some plastic around it and melted the hot glue with a lighter to hold it in place. I want to be able to remove the motor and battery and needle for cleaning, so after I lock the motor in I snuck it out. I then attached the pen perpendicular to the motor. I took the motor out, broke off a sprocket from the gear on the motor, and then wrapped it in tape, then dabbed some hot glue on to hold it in place. This is usually accomplished with a pencil eraser, but those eventually crumble and I think this'll hold up better. I made the battery holder and used a lot of glue to stabilize it so it didn't rock, which is nice. Finally, I had to make the needle. I straightened out the paper clip and bent the top off at 90 degrees to fit into the sprocket. After sticking it in, I measured how low the paper clip stuck out when the motor was spun to the bottom and broke it off at a good distance out from the bottom. Then I removed the paper clip and started sharpening it to a needle. After getting it to a satisfactory point, I stuck it in. I descended the needle and then used the lighter to lightly heat the tip of the pen and squeezed it with my fingers to make it tighter around the needle so it doesn't vibrate so much. Finally, it's all together and works! I used it to etch into some plastics, and poked myself a few times (without ink) to see how it compared to getting a real tattoo. It's much more crude and goes deeper so it hurts more, plus it's a fat little needle. All in all, though, it's pretty amazing that I was able to make it in about an hour with no tools whatsoever. A prisoner would make ink from pen ink or some other stuff around, I haven't researched that much, I just know they only use black ink. To sterilize the needle, they burn it with the lighter. Here's some pics, feel free to mail me with questions and stuff!

Tattoo Gun 1
This is the whole gun/pen thing. Looks pretty sinister, huh?

Tattoo Gun 2
This is the back of the motor, the back of the motor mount, and the battery holder, plus the wiring. Simple, notice the crappy Hot Melt. That's what you get with a lighter!

Tattoo Gun 3
Here's the battery connector, the motor mount, the top of the pen, and most importantly the crank of the motor. It's the sprocket on the motor with a tooth knocked off, a little hot melt, wrapped in some masking and electrical tape. Rudimentary, but it works well.

Tattoo Gun 4
The paper clip needle connects with a 90 degree bend at the top into the hole into the sprocket of the motor. This is what it looks like in the down position.

Tattoo Gun 5
This is the paper clip needle in the up position. It's about a 1/4 inch difference from top to bottom when the needle is moving, and depending on how far the needle sticks out from the pen it sticks differently into the skin. A more advanced gun may move the pen shaft or connect to the motor with an adjustable height, but for prison this would work fine. I mean hell I filed it against stone, this isn't exact science anyway.

Tattoo Gun 6
You can see the needle descend down the pen shaft, even though it moves back and forth the angle from top to bottom is so slight it's negligable, the big movement is up and down.

Tattoo Gun 7
The tip of the pen with the needle up. It looks mangled for a reason, the pen is natively much wider than the needle, so I let the needle down and used a lighter to heat the pen. I then squeezed it to make it tight around the needle, not too tight though. Without this, the needle slides back and forth violently, making straight lines impossible.

Tattoo Gun 8
Finally, the needle down.

- - - - - - - - - - - - - - - - - - - - - - - - - - - - - - - - - - - - - - - - - - - - - - - - - - - - - - - - - - - - - - - - - - - - - - - - - - - - - - - - - - - - - - - - - - - - - - - - - - - - - - - - - - - -

Jenn’s Christmas Gift: The Jewelry Box

For Jenn for Christmas, I made her a completely hand made box. How hand made? Like hand tools, like carved the wood with a scalpal not even a saw. The only power tool I used was an air powered nail gun to hold it together. I wanted to make her a chest to be used as a jewelry box or a memory box or whatever, but I wanted it to be symbolic of everythign that is us. I think it came out well, the plan was to build a box out of masonite, then frame it with carved balsa wood which I'd stain and finish to harden. The inside was felted with velvet and the bottom has a blue felt so it won't scratch the ground. I used brass fittings for the hinges and latch. I didn't take a lot of in progress pictures, so check out what I did do. It took a LONG time, and the carving was so much mess and work all over my parent's house. I first lightly drew on the balsa, then carved out the big chunks, then shaved to give it perspective. This is an awesome showcase of my woodworking skillz, and I think I've showcased both my artistic and my electronic skills, I proved my metal skills on the supercomputer, and my acrylic skills on the cube. I'm a penta-threat. Biotch.

Box 01
I carved all the balsa wood with a scalpal, formed it to fit exactly around the hard masonite box. One of the things Jenn and I love is bowling, so I made one of the sides of the lid about bowling. How's it look?
Box 02
We do puzzles a lot, so the other side of the lid is puzzle pieces. I like that I left a few cut out, makes it more authentic. Carving out the whole inside to make it just less deep as the border was a pain, but it is worth it.
Box 03
The felted inside of the top, with the balsa showing through on the bottom. I basically felted the pieces with a 1/4 inch border with no felt before I assembled them, so it'd all go together with glue and nails.
Box 04
Another angle of the lid, I think the felt looks really professional.
Box 05
The inside of the main box, you can see framing with the balsa on the sides.
Box 06
The front, JL for Jennifer Landers, and a pumpkin since her nickname is punkin. The jagged thing at the top is for the latch to connect to. Does that look like a pretty realistic pumpkin?
Box 07
The camping scene, this was the first one I did, I think it's one of the neater ones.
Box 08
This inscription on the back took an hour and a half to do. Just to show you how long this process is.
Box 09
"Merry Christmas, With Love, Joe, 12-25-2005"
Box 10
This was by far the hardest and most intricate one. TV, movies, and video games, it's what we're all about. But it took so long and I had to repair those little pieces so many times!
Box 11
The top of the box, I had to cut angles into strips of balsa to make it founded like that, then used the scalpal to smooth the corners.
Box 12
So, I finished it and stained it and gave it to Jenn, and Jenn took these finished pics. Front, side, with latch on. Notice the felt on the bottom.
Box 13
Side, back, with hinges. I slopped the finish and stain on to make it seem like an ancient pirate chest or something, I think it looks pretty authentic.
Box 14
Other side and hinges.
Box 15
And again.
Box 16
And again.
Box 17
I rock the freakin hizzouse.

- - - - - - - - - - - - - - - - - - - - - - - - - - - - - - - - - - - - - - - - - - - - - - - - - - - - - - - - - - - - - - - - - - - - - - - - - - - - - - - - - - - - - - - - - - - - - - - - - - - - - - - - - - - -

Snazzy Duct Tape Jacket!

For Meg's 19th birthday, I made her a duct tape jacket. It's pretty rad, I consider myself a connesiur of the duct tape arts. Here is my tale.
Duct Tape Jacket 1
Supplies. Notice the virgin jacket I pulled out of the thrift shops. Perfect size for Meg.
Duct Tape Jacket 2
It begins, like the mirror covering Neo's arm in the Matrix!
Duct Tape Jacket 3
You can keep drugs in the pockets.
Duct Tape Jacket 4
Flash forward to when I'm done covering it in silver tape. It's awesome.
Duct Tape Jacket 5
Slightly closer.
Duct Tape Jacket 6
Poof! Outlined in green to give it pizzaz!
Duct Tape Jacket 7
Pretty badass, huh?
Duct Tape Jacket 8
The back.
Duct Tape Jacket 9
It's the details that make this thing pop. Hope you appreciate my work!

- - - - - - - - - - - - - - - - - - - - - - - - - - - - - - - - - - - - - - - - - - - - - - - - - - - - - - - - - - - - - - - - - - - - - - - - - - - - - - - - - - - - - - - - - - - - - - - - - - - - - - - - - - - -