

Welcome to Joe’s Xbox Mod Chip Installation Guide!
Here, I'll try to show you the simple process for modifying the Xbox console and adding a mod chip. The chip I am describing is the Xecutor 2.3b lite, but the process should be similar for any chip. First, you need to take your Xbox apart.

Remove the 6 hex nuts with a torx driver t-20. There's a screw under 2 of the labels, write the number you must break through down somewhere, in case it's important. You'll see when you do it. I wrote mine on the same label, with a sharpie. Once the screws are out, remove the cover.
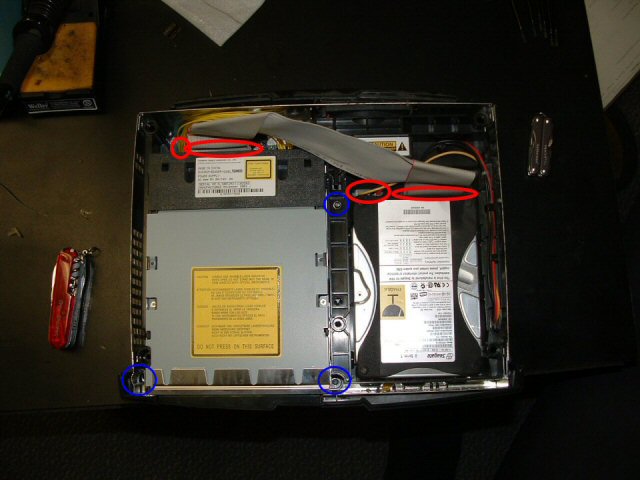
Once in, unplug the ribbon cable to the hard drive and the CD ROM and the motherboard, and unplug the power from the hard drive. There is a yellow wire coming from the CD-ROM, unplug that from the motherboard. There are 3 screws holding the drives in, these are t-10 torx wrenches. Remove them, then remove the drives, hard drive first.
Next, unplug the power, fan, front buttons, and controllers from the motherboard. Unscrew the screws with a t-10 torx.

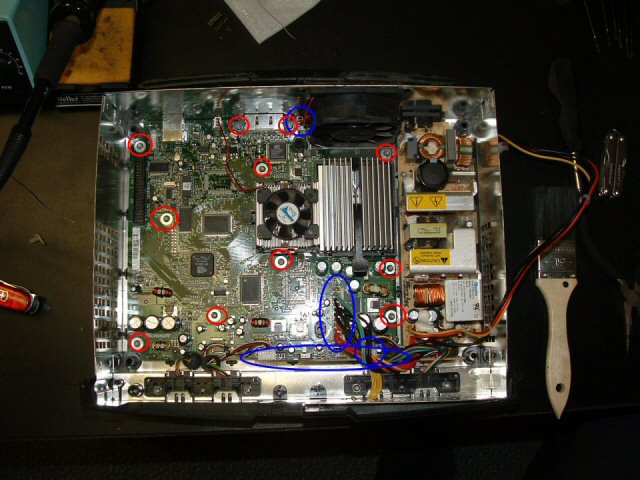
Carefully remove the mothehrboard from the case. You may need to lift it from the front first, so the plugs in the back slide out. Place it on a smooth, nonconductive surface. We will be focusing on a small area of the board.
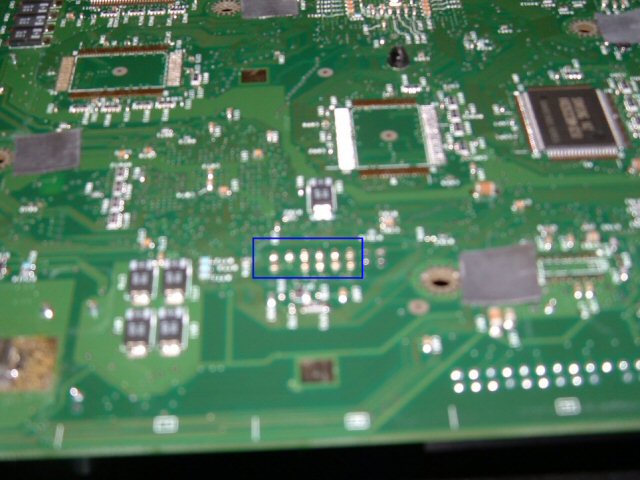
We will be doing 2 major soldering projects: The pins for the BIOS upgrade (which are surprisingly here from Microsoft, maybe for testing or future add ons? Let's not complain!) and the d0 point. The d0 point is in a different spot on different versions of the Xbox, and this is a 1.0 version. You can learn about your version and how to distinguish it here, and later on I'll show you exactly where the d0 point is on your board. In the rows of holes, we need to remove the solder. This is a fairly simple procedure if you get a solder sucker, which is about 6 dollars at radio shack. A solder sucker is a spring loaded piston which you can set by pressing down on the spring until it locks, and then with a push of a button make it spring up, creating a vacuum inside. Put the opening over liquid solder (made liquid by heating with the soldering iron) and the solder inside the hole should suck right out.

If done correctly, it looks like this. Don't worry about leaving a little solder in each hole, so long as you think you could push a pin through it, it'll be ok. You'll notice later we don't solder into all holes, but clean them out anyway, it's good practice and who knows, maybe one day a new mod chip will use them for something.

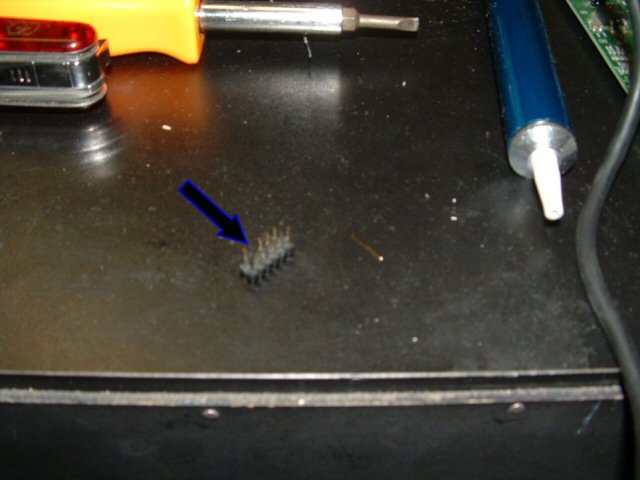
This is the pin header we will be installing. A pin header should come with any mod chip you buy. This is the preferred method for installing mod chips because it allows for ease of exchange (If you decide to upgrade to a new generation chip) and a solid connection. Before we insert this, we must remove a pin, since there is a spot with no hole which must be accounted for.
If you can see, it's the second pin up on the left. This can be easily slid out with a pair of pliers.

Place the pin assembly in the holes, it shold only fit in one place. Tape it down with some masking tape or something, making sure it's all the way in. The tape will later be removed, it's to hold the pin assembly on when we flip the board upside down and solder the pins.
It's blurry, but these are correctly soldered pins from the bottom of the board. You should practice some first, but by touching the top of the pin with some solder and a hot iron, the solder should on its own stick to the metal of the hole and form a little hersy kiss type joint.

This is not part of the Xbox, but it's a better picture of a proper solder joint.

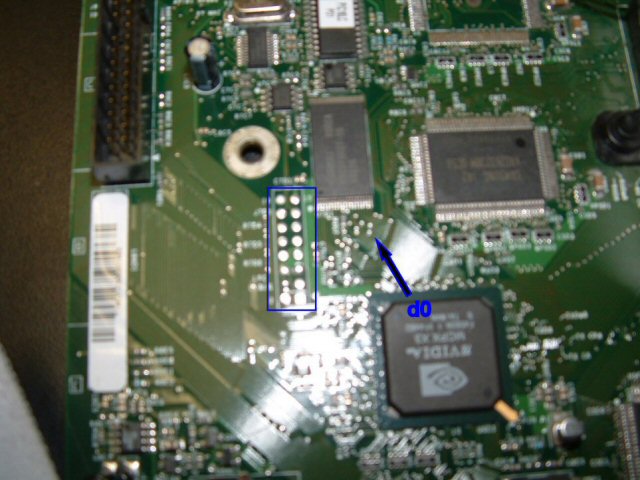
Now, onto the "impossible" part, the d0 point!!! I'm sure everyone has heard how the d0 point is the most difficult thing to deal with ever, and that you'll be trying for days and ruin your Xbox doing it. Remember the picture above? If you look at your hole on your Xbox, you'd swear I'm kidding you about soldering to that tiny spot, but you do indeed need to have a connection to it - or, if you're smart, just make a connection to something already connected to that point. Here is where the d0 point is on the different boards.
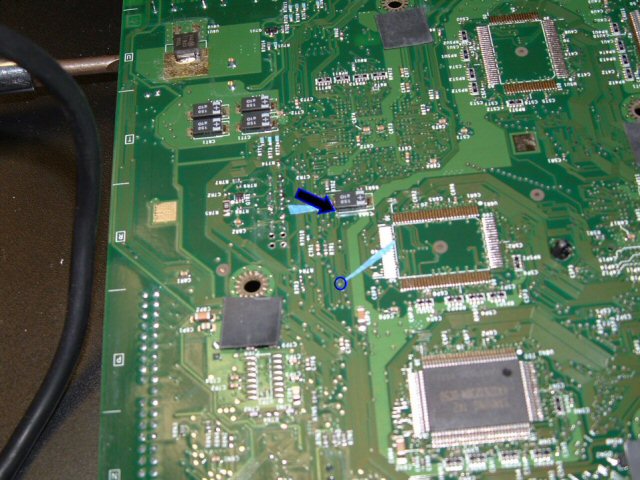
If you flip the board over, you can find the spot on the back the hole is connected to, and follow the trace attached to it to find a nice, easy to solder spot. Yes, the bottom blue arrow points to a completely valid d0 point. Surprisingly, most guides don't tell you to do it this way, but this is reality folks, and this is the sinple and solid way to do it. Also, by going from the bottom, you decrease the chance of accidentally pulling the wire out when messing inside the device, making it all the more attractive to solder to. If you don't have the same version as me, just find your d0 point, find where it comes through on the back, and follow it's trace, you'll find something there easier to solder to.
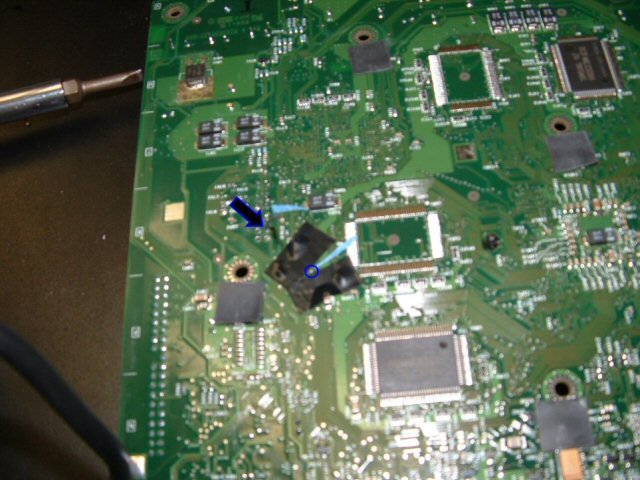
In this picture, I covered the solder points around the d0 point with some electrical tape. This is to ensure I don't accidentally make a connection with something I shouldn't. Also, looking at the holes for the pin header, there's 4 holes we cleaned and didn't use; I put a length of wire through one (which happens to be grey), and the wire I used was pretty snug in that hole. Later on, you'll see that a snug wire is added security so that nothing will tug on the joint you make. The grey wire is hard to see here, but it's on there, sticking up out of the second hole on the right. So, without much ado, I put some excess solder on the exposed tip of the grey wire, I used some pliers to hold the stripped end of wire onto the contact point, heated it with the soldering iron, and when it looked like it fused gave it a light tug to make sure. When I was sure (after 1 try on both the xboxes I did, and no I'm not a pro solderer) I taped over the connection so it didn't touch the bottom. (alternatively, you could put tape on the bottom of the metal in the xbox, so if you ever want to look at your solder joint there isn't tape stuck to it)

So here's the top of the board again, all back in the case. I used the Xecutor 2.3b lite chip, which I like very much. You can follow the grey wire coming out of the hole we cleaned out; I left some of the end of it exposed, and merely twisted the end of it to the exposed end of the little grey wire coming out of the chip (The intended use of that little grey wire is to solder onto the front d0 point, but that's ridiculous) and covered it with electrical tape. There are 2 wire sets plugged into the chip; the one to the ground/d0 wire, and a set of black wires which we will use in a minute. Have both plugged into the chip, and screw the ground hole into the ground screw hole on the motherboard. Notice on the chip there is a black rectangle with holes in it; that will be sliding onto the pins you installed.
Once you are ready, put the chip on the pins. It should look something like this. Notice the black wires coming out of the chip closest to the camera, we'll deal with those next.

With this chip, there is a small control panel and LED that go on the front of your machine. To put them there, unscrew the controller ports from the front of the xbox and move them aside. Feed the end of the black wire through the vent holes in the bottom. This was the trickiest part of the mod for me since I have big stubby fingers. Tweezers are your friend!

This is what the little switch chip looks like once it is installed. The wire through the controller ports comes through and plugs in with no extra wires hanging out, the white backing is peeled off and the stick surface is stuck to the bottom of the console, and the switches and LED are accessible from the front.

Once you put the controller ports back in, it should look something like this, with the wires coming out the bottom of port 1. Finally, we are done!!! Plug everything back in like it was, and you're ready to make things work!!!
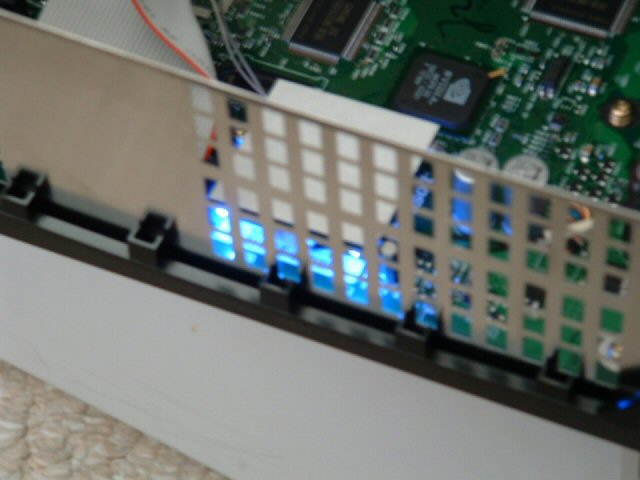
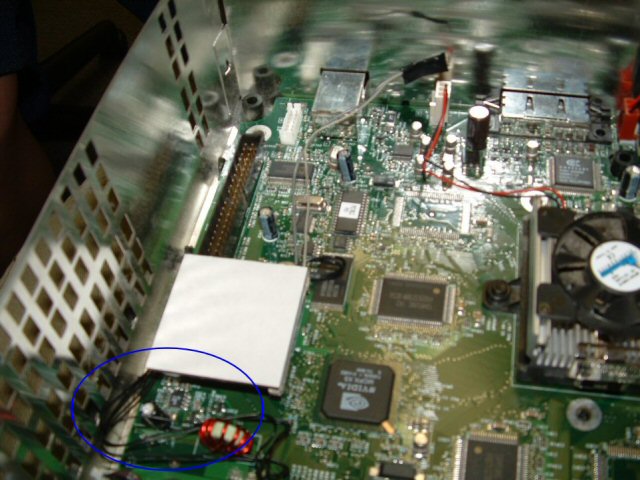
To do the final check that your chip is installed correctly, once you've hooked all the internal guts back up, power it up and see if these 2 blue lights are visible from the side of the Xbox with the chip. If both are lit, everything is connected and you should be good to go. If they are not lit, then go back and check your connections, specifically the d0 connection. Keep at it, you'll get it eventually. Happy modding!